BMW E46 Facelift Coupe Power Fold Mirror Retrofit
After some kind individual decided to rip off my driver side wing mirror, I decided that rather than just repairing/replacing the broken one like for like, I would take the opportunity to upgrade the entire setup to power fold mirrors.
There are different types of mirrors and mirror switches that BMW installed on these cars and the setup of any given car depends on other things such as whether the car has electric memory seats, for example .
This guide is concerned particularly with my own car which, for reference, had factory installed manual fold mirrors and memory seats. Whilst I uncovered a lot of information about pre facelift cars, there are still some areas that are a mystery to me!
The Switches
The underside of the mirror control switch is coloured depending on the configuration of the car. The main ones are detailed below with part numbers:
| Light Blue | Manual Fold | Memory |
| Black | Manual Fold | Non Memory |
| Purple | Power Fold | Memory |
| Yellow | Power Fold | Non Memory |
Since I had memory seats/mirrors already, I had a light blue backed switch installed. I just needed a pair of power fold mirrors and the purple backed switch (part number 61316901383, approx £54 from BMW).
The Mirrors
The mirrors come in two main types – power fold and manual fold. The wiring on a pre facelift car is a bit more complicated – the connectors are available in different types and the car itself has separate modules for the driver and passenger mirror control. The retrofit at this stage could be more complicated if your car is missing certain modules.
On a facelift vehicle, like mine, BMW shifted mirror control to the GM5 ECU module which eliminates the requirement for separate control modules. This also resulted in the mirrors changing their connector to a ribbon style one that is not backwards compatible with the old pre facelift mirrors.
Hardware – Mirror Frames
Actually replacing the old mirrors with the new power folding ones is fairly straight forward.
- On the inside of the door, remove the plastic triangle covering the rear of the mirror base plate. You should be able to see two bolts and the mirror cable running into the door.
- Pulling the top corner of the door card away from the door should pop out the top most retaining clip and if you have small enough hands, you might just be lucky enough to be able to reach the connector clips and undo them. If not, then you will need to remove more of the door card (other bolts in the handle and further retaining clips need to be popped out).
- Undo the two retaining bolts holding the mirror to the door and the mirror should come free easily.
- Follow the process in reverse to install the new mirror
Hardware – Mirror Glass
- Remove the mirror glass from the old mirrors by tilting the glass all the way to one side and pushing gently but firmly till the retaining clip on the opposite side releases. Work your way around the edge until all four are free. Be careful – replacement tinted, heated mirror glass from BMW is around £75 each! Cheaper alternatives here:
For the saloon
DoctorAuto DR165561 Door Wing Mirror Glass Outer Heated Blue With Plastic Holder Left side
DoctorAuto DR165560 Door Wing Mirror Glass Outer Heated Blue With Plastic Holder Right Side
For the coupe
BMW 3 Series (E46) (2 Door) 1998 to 2007 Blue Tinted, Aspherical, Electric, Heated Passenger Side (LH) wing mirror glass with backing plate
BMW 3 Series (E46) (2 Door) 1998 to 2007 Drivers Side (RH) Blue Tinted, Aspherical, Electric, Heated wing mirror glass with backing plate - Disconnect the two heating element cables on the rear of the glass
- Reinstall the glass in the new mirror unit by pushing it evenly onto the clips behind – don’t forget to reconnect the heating element!
Hardware – Mirror Cover
- Once the mirror glass has been removed, you should be able to see four retaining clips that hold the plastic cover that shields the rear of the mirror. Depress these clips to release the cover.
- Reinstall the covers on the new mirrors. Be careful with these too – replacements are around £35 each from BMW and they come unpainted so you would need to have them sprayed to match your car’s paint.
Hardware – Mirror Switch
- The easiest way to remove the mirror switch is to pop off the adjustment toggle and use a pair of pliers or grips to pull upwards gently. The switch should slide out after a bit of initial resistance.
- The single connecting cable plugs directly into the new purple switch and it slots into the same hole.
At this point, the mirror adjustment controls should work but the power fold will not. The car needs to be coded to first inform the ECU that power fold mirrors are installed and secondly that the feature should be enabled.
Software – Changing The Vehicle Order (VO)
This post details the process of adding the power fold mirror package to the vehicle option list.
Software – Enabling the Power Fold Feature Using NCS Expert
- Connect the diagnostic cable and turn the ignition to POSII
- Start NCS Expert
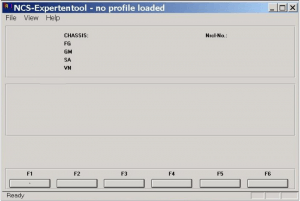
NCS Expert Main Screen - Use File > Load to load an ‘Expert Mode’ profile

NCS Profile Selection - Press the VIN/ZCS/FA button (F1)
You will be prompted to select a chassis and an ECU module to read from. On my car, I selected E46 and the AKMB module. After reading the module, the fields in the top half of the NCS Expert screen will be populated with details of the car (VIN, VO etc). If no information appears, repeat the process with a different module. - Press the Back button (F6)
- Press the Process ECU button (F4)
We are going to read the settings currently stored on a particular module. From the list, select the module that needs to be read/coded. I selected GM5 since the mirrors on my car are controlled by this module. Older cars will potentially need the FTM and BTM modules as well as the GM5 but the process outlined here is the same for them. - Press the Change Job button (F3)
IMPORTANT: Since we want to read settings and not write at this stage, select CODIERDATEN_LESEN from the list. - Press the Execute Job button
When the text changes from Coding Activ to Coding Ended, the read has completed. A file will have been created in NCSEXPER\WORK called FSW_PSW.TRC (overwriting any older files with this name). This file contains all the settings available in the earlier selected module and their state (usually enabled/aktiv or disabled/nicht aktiv). It is advised that you save this file as a backup with a different name. - Create a copy of the saved trace file in the same directory and rename it FSW_PSW.MAN.
Remove any other file of this name first. This is the file that you need to modify and will eventually write back to the module. - Open FSW_PSW.MAN in a text editor.
All the options here are in German so you may need to do a bit of research if you want to modify any other options but the ones applicable to the folding mirrors that I enabled are as follows:FSW_PSW.TRC (Original) FSW_PSW.MAN (Modified) Translation BEIKLAPP_B_KOMFORTSCHL_GM nicht_aktiv BEIKLAPP_B_KOMFORTSCHL_GM
aktivComfort Mirrors BEIKLAPPEN_GM
nicht_aktivBEIKLAPPEN_GM
aktivFolding Mirrors SPIEGELMEMORY_GM
nicht_aktivSPIEGELMEMORY_GM
aktivMirror Memory Save the file after editing.
- Press the Process ECU button (F4)
Select the same module that was originally selected for the read operation in step 6. - Press the Change Job button (F3)
Select SG_CODIEREN from the list. This is the WRITE operation. - Press the Execute Job button
When the text changes from Coding Activ to Coding Ended, the write operation has completed. The modified settings saved in the FSW_PSW.MAN file have now been written to the specified ECU. - Turn the key from POSII to OFF then back to POSII to power the modules up again.

All being well, the mirrors should now be fully functional and fold up and down when pressing the button on the interior switch. They will also fold up when you lock the car with the fob and then hold the lock button down (part of the comfort access option). They will fold back down when the car is unlocked.
As mentioned previously, if the vehicle is a pre-facelift, similar options (and likely additional ones) will need to be coded to the door control modules BTM and FTM as well as the GM5.
Hope this helps anyone wanting to do a similar retrofit!


Until you get it to work with voice control, you FAIL!
Hi that’s a great article, could you help me with a similar thing!
do you know anyone local to nottingham/loughborough/derby that could enable the mirrors to fold from the key lock/unlock. retro fit M3 mirrors everything else works memory, fold up and down from switch button. help much appreciated roy
I think its the comfort access option that needs to be enabled. The fold up on lock usually works when you lock and hold down the lock button for a few seconds (can’t remember exactly how long).
You may be better asking on an owners club for someone local who might be able to give you a hand :)
HI Guys, I have a 2005 E46 facelift diesel, it has a manual wing mirror, but I want a power folding mirror, I have bought the power folding mirror and I have installed it, but there are 2 connector which i think one is for electric switch, and the other connector is for power folding, however i haven’t got that in my car, do you guys knows who can help to retrofit it to my car, am ready to pay for it.
Michael
Hi Michael, can you post a link showing which connectors you are talking about or a link to the same exact mirrors you bought? A picture of the wing mirror without the plastic cover would help. So I can tell you what you are missing. I have just done the conversion on my Facelift E46 330Ci.
Hi P-Man,
I haven’t really got a link, but I bought the power folding mirror on eBay and I installed it myself, the one I bought of eBay looks like this link on eBay here, please I would really appreciate if you can help.
Thanks
Michael
Hi P-Man,
The power folding mirror I bought on eBay has 2 separate wires attached to individual mirror and 1 of the wire is longer than the others with connector plug on the ends of each wire, the link I sent you earlier in my previous message is the type of power folding mirror I bought of Ebay, so if you can please check that might be able to give you an idea of what the wing mirror I have on my car looks like, thanks a lot mate.
Michael
Great article,
Ive hit a bit of a brick wall with my install though and thought you could help. I have a 2006 convertible (ribbon connectors) and finally got my hands on a genuine OEM pair of M3 Power folding mirrors with the purple back switch and like you I have memory seats. The problem Im having just now is the connections… My mirrors are 12 pin (10 wires) and my wiring loom has 6 pin (2 sets 0f 3 wires). I understand that I might have to strip the wires and connect them individually but I have no idea what colour wires to connect (both on the loom and the mirror end) plus doesn’t that leave me with 4 wires on the mirror unconnected?
Ive been searching online all day but can’t find an in depth installation guide for this as most of the sites are pre facelift retrofitting, tackle non memory seat installs (complex module setup), or only take me up to the wiring but don’t explain or show the process from there.
Any help you can give would be great.
Ross