Sonoff Smart WiFi Switches Tasmota External Sensor 5V PIR Mod
Following on from this guide about flashing the Sonoff ESP8266 based wifi switches with custom firmware (Tasmota), this guide deals with how to use them with external sensors on one of the free GPIO pins as a secondary trigger. I wanted to use a PIR to create a motion sensor.
The sensor I used was a HC-SR501, a cheap and cheerful PIR module. It has adjustable sensitivity and delay, single or multi trigger and is well documented. Schematic here.
You can buy these cheaply from the usual places
Amazon:
Sonoff Basic
3x HC-SR501
eBay:
Sonoff Basic
Multi or singles HC-SR501

If you use a sensor that can work with 3.3V, this makes life a bit easier as you can just use the 3.3V, GND and GPIO14 header pins you soldered on already to program the ESP8266.
Although the HC-SR501 module has a logic output at 3.3V, suitable for GPIO, it only works with 5-20V. Looking at the schematic, you might be able to run the module by applying power at 3.3V after the voltage step down but I didn’t look further into this method.
The method I chose to use was to take a 5V supply from the Sonoff module and run 5V VCC, GND and GPIO to the PIR module. This requires reasonable soldering skills so practise on something first if you aren’t sure!
Getting 5V
Fortunately, the schematic for the ESP8266 circuit is readily available and shows that the relay switching is performed by a 5V line.


These are extracts of the full schematic showing the relevant part. You can see that the 5V (VCC BAR) line runs to Pin 1 of the relay, pin 3 of the regulator, D5, R15, C9 and D4. Running a spur off any of these will give access to a 5V supply for the PIR module.
I soldered a single header pin to an unused hole in the Sonoff PCB and cut the connecting track (it appeared to be connected to nothing, but I did it anyway to be sure).
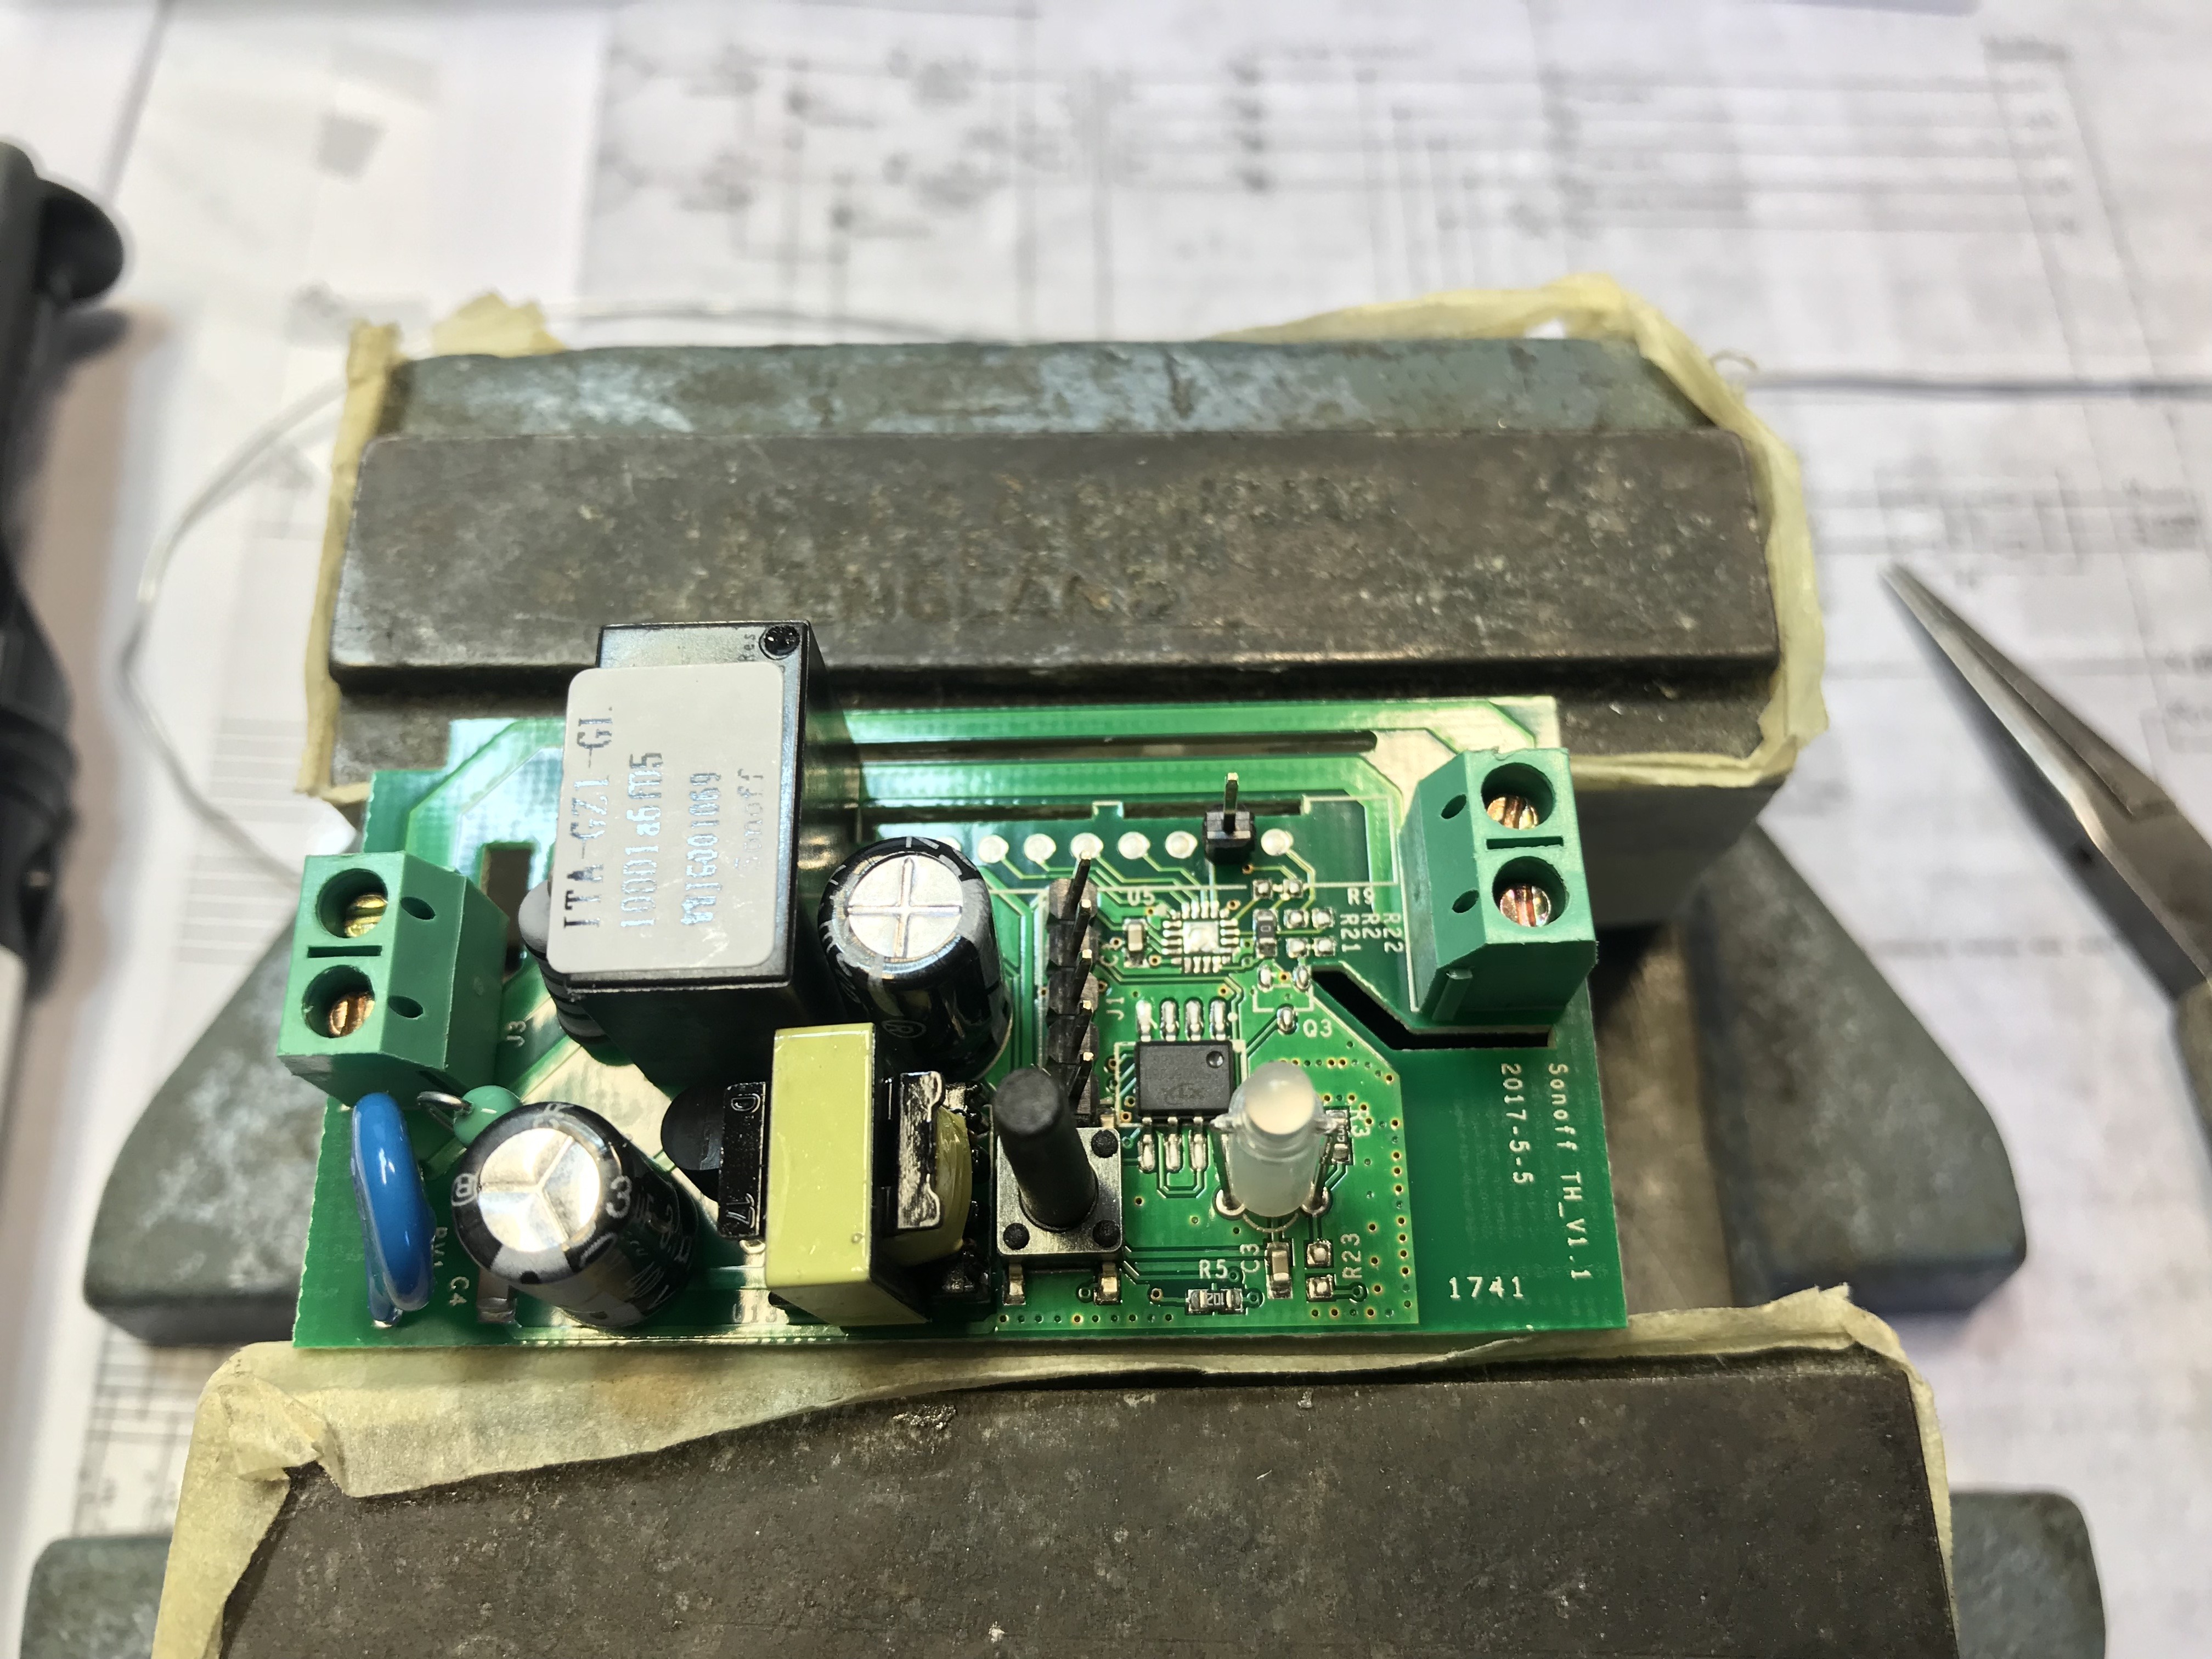
Then on the reverse side of the PCB, connect a single jump lead between this header pin connection and one of the through components that lie on the 5V line. I used C9 as I think it is easier to solder to a through mount component than anything surface mount.

Connect the PIR
Test the connections before applying mains power!
I just used a set of 3 Dupont wires to plug onto the header pins. Using the newly sourced 5V; GND and GPIO14 from the existing programming header, connect the corresponding pins on the PIR module.

Configuring the Secondary Trigger
There are two ways to have the secondary trigger work. By default, the PIR would trigger the relay on and off autonomously based on the sensitivity, delay and trigger mode settings applied using the inbuilt controls on the PIR module itself.
PIR TRIGGER -> RELAY ON -> TIME DELAY LAPSES -> RELAY OFF
I wanted more control over the process so rather than allow direct control, I changed the switch mode in Tasmota to send a SwitchTopic MQTT message to my listener server. This allows some conditional processing to take place e.g. customisable delay, toggle motion detection on/off. For example:
PIR TRIGGER -> SWITCH SENDS MOTION DETECTED MQTT MESSAGE -> [SERVER PROCESSING/IS MOTION DETECTION IS ENABLED? -> SERVER SENDS MQTT RELAY ON MESSAGE -> RELAY ON -> SERVER PROCESSING/DELAY LAPSES -> SERVER SENDS RELAY OFF MQTT MESSAGE -> RELAY OFF]
Seems more complicated (and it is!) but infinitely more controllable. I’ll not go into the logic of the software configuration on the server itself in this post but will cover the scripts and rules used elsewhere.
Console Configuration Commands
First set the mode for GPIO14 to 10 Switch2 using the GUI

You could do this in the console by typing
gpio14 10Now, using this page as reference, I used the following commands:
switchmode2 1
to enable switchmode2
switchTopic [some unique switch topic]to set a unique MQTT topic for the GPIO sensor trigger to transmit
Now reboot the Sonoff device and when the sensor is activated the console should report a transmitted ON MQTT message with the SwitchTopic you set above and an OFF MQTT message with the sensor trigger goes low (i.e. when the configurable delay time on the PIR module lapses).
With this configuration, I use the single trigger mode on the PIR module and a hardware set delay of around 20-30 seconds. This ensures I don’t flood the server with repeated SwitchTopic ON/OFF messages but still catch any movement to ‘re-trigger’ the sensor to reset the server configured timer scenarios. Everything is then controlled by the server hosted GUI.


